개발 순서
1. okta.com에서 개발자 계정을 만든다.
2. Okta에서 Open ID Connect 클라이언트 앱을 추가
3. OpenID Connect 를 위한 앱 설정
4. Okta SDK dependencies를 설치
5. Okta Sign In 위젯 통합
6. login/logout 버튼을 위한 login status component 추가
7. routes를 연결할 수 있는 App Module config 수정
3.
ng generate interface config/MyAppConfig
으로 config 파일을 생성한다.
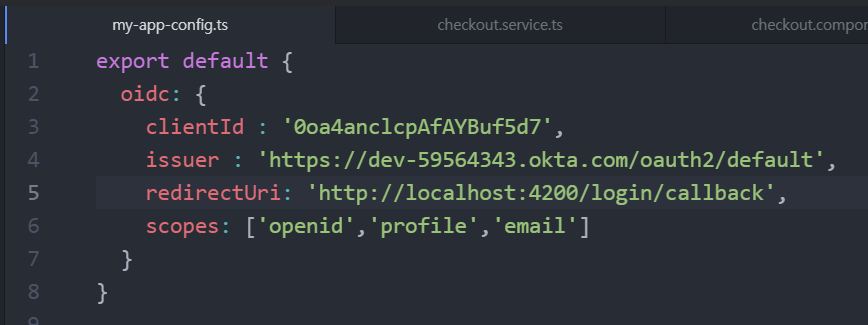
Client Id는 클라이언트 앱의 public identifier
issuer는 토큰의 발행자이고 Okta Authorization Server에서 승인하는 곳이다.
redirectUri는 유저가 한 번 로그인하면 보내는 곳이다.
Scopes는 유저 정보 접근을 제공한다.
openid는 인증 요청에 필요한 것
profile은 유저의 성, 이름, 휴대폰번호 등등
email은 유저의 이메일 주소.
4.
Okta Sign-In Widget, Okta Angular SDK를 사용한다.
Okta Sign-In Widget은 자바스크립트 라이브러리이다.
Okta Angular SDK는 authentication과 authorization에 관련한 Angular Router 통합을 제공한다.
OAuth 2.0 API를 사용한 Okta로부터 login/logout 기능
유저 정보를 갖고오고 authentication 상태를 확정한다.
설치는 다음 명령어를 입력하여 설치한다.
npm install @okta/okta-signin-widget
npm install @okta/okta-angular
5.
6.
login component는 로그인 화면을 구성한다.
ng generate component components/login
login.component.ts 의 내용을 다음과 같이 작성
import { Component,Inject, OnInit } from '@angular/core';
import { OktaAuthStateService } from '@okta/okta-angular';
import { OKTA_AUTH } from '@okta/okta-angular';
import { OktaAuth } from '@okta/okta-auth-js';
import * as OktaSignIn from '@okta/okta-signin-widget';

import myAppConfig from '../../config/my-app-config';

@Component({
  selector: 'app-login',
  templateUrl: './login.component.html',
  styleUrls: ['./login.component.css']
})
export class LoginComponent implements OnInit {

  oktaSignin: any;

  constructor(private oktaAuthService: OktaAuthStateService,
    @Inject(OKTA_AUTH) private oktaAuth: OktaAuth) {

    this.oktaSignin = new OktaSignIn({
      logo: 'assets/images/logo.png',
      baseUrl: myAppConfig.oidc.issuer.split('/oauth2')[0],
      clientId: myAppConfig.oidc.clientId,
      redirectUri: myAppConfig.oidc.redirectUri,
      authParam:{
        pkce:true,
        issuer: myAppConfig.oidc.issuer,
        scopes: myAppConfig.oidc.scopes
      }
    });
   }
  ngOnInit(): void {
    this.oktaSignin.remove();
    this.oktaSignin.renderEl({
      el:'#okta-sign-in-widget'},
    (response:any) => {
      if(response.status === 'SUCCESS'){
        this.oktaAuth.signInWithRedirect();
      }
    },
    (error:any) => {
      throw error;
    }
  );
  }
}
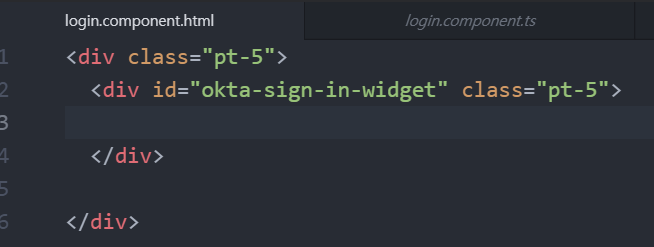
el의 값은 login.component.html 의 div id 값과 같아야 한다.
주어진 id 값을 받아서 그린다는 뜻이다.
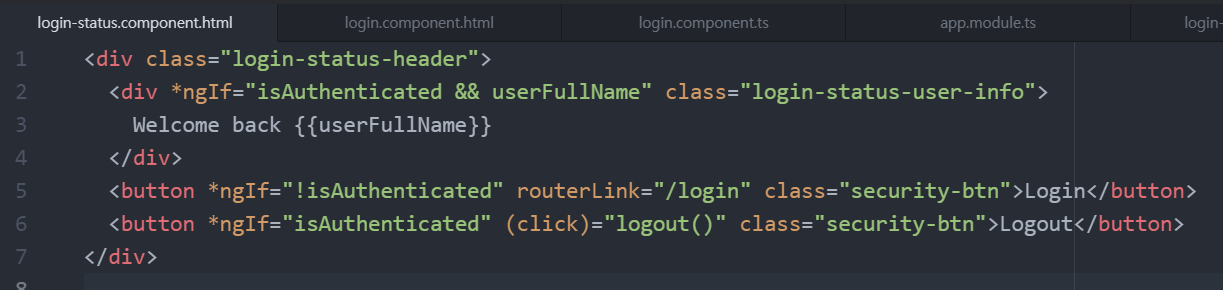
login status component는 로그인/로그아웃 버튼을 구성한다.
ng generate component components/LoginStatus
login-status.component.ts의 내용은 다음과 같이 작성한다.
import { Component,Inject, OnInit } from '@angular/core';
import { OktaAuthStateService } from '@okta/okta-angular';
import { OKTA_AUTH } from '@okta/okta-angular';
import { OktaAuth } from '@okta/okta-auth-js';

@Component({
  selector: 'app-login-status',
  templateUrl: './login-status.component.html',
  styleUrls: ['./login-status.component.css']
})
export class LoginStatusComponent implements OnInit {

  isAuthenticated: boolean = false;
  userFullName: string;

  constructor(private oktaAuthService: OktaAuthStateService,
    @Inject(OKTA_AUTH) private oktaAuth: OktaAuth) { }

  ngOnInit(): void {
    this.oktaAuthService.authState$.subscribe(
      (result) => {
        this.isAuthenticated = result.isAuthenticated;
        this.getUserDetails();
      }
    )
  }

  getUserDetails(){
    if(this.isAuthenticated){

      this.oktaAuth.getUser().then(
        (res)=>{
          this.userFullName = res.name;
        }
      );
    }
  }

  logout(){
    this.oktaAuth.signOut();
  }
}
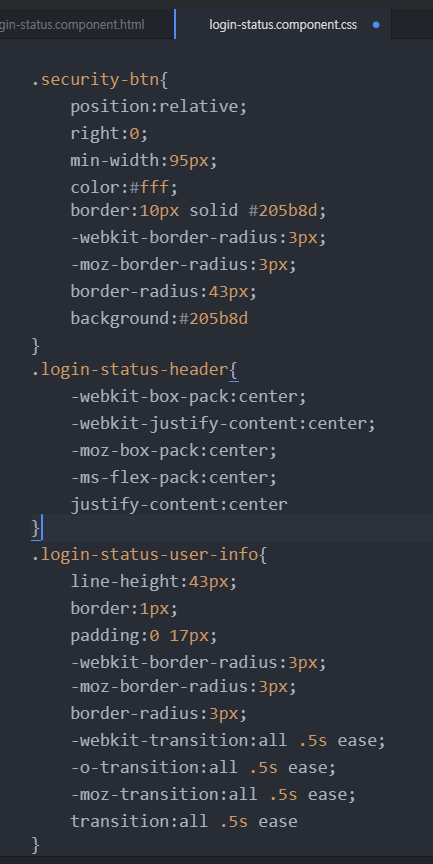
src 폴더에 있는 전역으로 적용되는 styles.css에서
.au-btn-submit 을 검색해서 복사한 다음
login-status.component.css 파일에 붙여넣고
.security-btn으로 이름 변경하고 내용을 수정한다.
styles.css에서 .form-header를 .login-status-header로 변경한다.
styles.css에서 .au-input을 .login-status-user-info로 변경하고
내용은 solid, font-size, color를 삭제한다.

7.
app.module.ts는 다음과 같이 작성한다.
import { NgModule } from '@angular/core';
import { BrowserModule } from '@angular/platform-browser';

import { AppComponent } from './app.component';
import { ProductListComponent } from './components/product-list/product-list.component';
import { HttpClientModule } from '@angular/common/http';
import { ProductService } from './services/product.service';
import { Routes, RouterModule, Router} from '@angular/router';
import { ProductCategoryMenuComponent } from './components/product-category-menu/product-category-menu.component';
import { SearchComponent } from './components/search/search.component';
import { ProductDetailsComponent } from './components/product-details/product-details.component';

import { NgbModule } from '@ng-bootstrap/ng-bootstrap';
import { CartStatusComponent } from './components/cart-status/cart-status.component';
import { CartDetailsComponent } from './components/cart-details/cart-details.component';
import { CheckoutComponent } from './components/checkout/checkout.component';
import { ReactiveFormsModule } from '@angular/forms';
import { LoginComponent } from './components/login/login.component';
import { LoginStatusComponent } from './components/login-status/login-status.component';

import {
  OKTA_CONFIG,
  OktaAuthModule,
  OktaCallbackComponent,
} from '@okta/okta-angular';

import myAppConfig from './config/my-app-config';

import { OktaAuth } from '@okta/okta-auth-js';

const oktaConfig = Object.assign({
  onAuthRequired:(injector:any)=>{
    const router=injector.get(Router);
    router.navigate(['/login']);
  }
}, myAppConfig.oidc);

const oktaAuth = new OktaAuth(oktaConfig);

const routes: Routes = [
  {path: 'login/callback', component: OktaCallbackComponent},
  {path: 'login', component: LoginComponent},
  {path: 'checkout', component: CheckoutComponent},
  {path: 'cart-details', component: CartDetailsComponent},
  {path: 'products/:id', component: ProductDetailsComponent},
  {path: 'search/:keyword', component: ProductListComponent},
  {path: 'category/:id/:name', component: ProductListComponent},
  {path: 'category', component: ProductListComponent},
  {path: 'products', component: ProductListComponent},
  {path: '', redirectTo:'/products',pathMatch:'full'},
  {path: '**', redirectTo:'/products',pathMatch:'full'}

];
@NgModule({
  declarations: [
    AppComponent,
    ProductListComponent,
    ProductCategoryMenuComponent,
    SearchComponent,
    ProductDetailsComponent,
    CartStatusComponent,
    CartDetailsComponent,
    CheckoutComponent,
    LoginComponent,
    LoginStatusComponent
  ],
  imports: [
    RouterModule.forRoot(routes),
    BrowserModule,
    HttpClientModule,
    NgbModule,
    ReactiveFormsModule,
    OktaAuthModule
  ],
  providers: [ProductService,{provide: OKTA_CONFIG, useValue:{oktaAuth}}],
  bootstrap: [AppComponent]
})
export class AppModule { }
onAuthRequred: 의 내용은
승인이 필요할 경우 Redirect 하는데
Redirect할 때 유저가 로그인 페이지(/login)로 갈 수 있게 설정한다.
OktaCallbackComponent는 한번 유저가 인증받으면 redirect를 해야 하는데
보통 response를 받아서 OAuth+OIDC 토큰을 저장해야 하지만
OktaCallbackComponent가 이걸 대신 해준다.
'컴퓨터공학 > Boot & Angular' 카테고리의 다른 글
| Angular> 리팩토링 (0) | 2022.03.30 |
|---|---|
| Angular> 유저 등록, 회원 전용, 세션 저장 (0) | 2022.03.29 |
| Angular> 로그인 로그아웃 기능 사전 설정 (0) | 2022.03.20 |
| Angular> 데이터베이스에 주문 정보 저장2 (0) | 2022.03.19 |
| Angular> 데이터베이스에 주문 정보 저장 (0) | 2022.03.13 |


